
Academy & Exam OS Installation Guide
6 min read
- Before you start
- Step 1: Create the database
- Step 2: Upload the files
- Step 3: Point the domain at the document root
- Step 4: Select PHP and enable extensions
- Step 5: Open the installer and enter the setup token
- Step 6: Complete the seven installer steps
- If the installation is interrupted
- What the installer writes
- After the installation
- Related documents
- Watch the Video Tutorial
Academy & Exam OS installs through a seven-step browser installer. No command line is needed for the installation itself; cron jobs are added afterwards.
Before you start #
Check that your hosting meets the System & Hosting Requirements. You need:
- a domain or subdomain with HTTPS (the installer refuses plain HTTP on a public host);
- PHP 8.3 or 8.4 with the required extensions, including
sodium; - an empty database on MySQL 8.0 or newer, or MariaDB 10.11, 11.4 or 11.8;
- a database user with the required privileges, including
TRIGGER; .htaccess/ URL rewriting;- the ability to run an every-minute cron job (after the installation);
- the SMTP details of the mailbox the site will send from (after the installation);
- Single Site and Multi Site only: your software licence key from your OsDot order. See Where to find license keys.
Reseller / White-Label edition: the installer has no licence-key step. Everything else in this guide is the same.
Step 1: Create the database #
- In your hosting panel’s database section (for example MySQL Databases), create a new, empty database.
- Create a database user with a strong password.
- Give that user all privileges on the new database. The panel’s “all privileges” option includes the required
TRIGGERprivilege. - Note the database host (often
localhoston shared hosting), port, database name, user name and password.
Step 2: Upload the files #
The web application is in the Web/ folder of your download. Only Web/webroot/ must ever be reachable from the internet.
Shared hosting (cPanel, hPanel and similar):
- In the hosting panel’s File Manager, upload the release ZIP and extract it on the server. Uploading one ZIP is faster and more reliable than uploading thousands of single files.
- Move the contents of
Web/(not theWebfolder itself) into the folder your domain or subdomain serves, for examplepublic_html/or the subdomain’s folder. The documentation files next toWeb/are not needed on the server.
If you upload with an FTP client instead, use SFTP or FTP over TLS where your host offers it, and keep the folder structure exactly as shipped.
VPS or cloud server: copy the Web/ folder to the server, for example to /var/www/academy/Web.
Step 3: Point the domain at the document root #
The most secure layout is a document root of Web/webroot/. Many hosting panels let you set a domain’s or subdomain’s document root directly; use that where available.
- Shared hosting that serves the upload folder: if you uploaded the contents of
Web/into the served folder, the shipped.htaccessfile forwards every request intowebroot/, and the.htaccessfiles inconfig/,storage/,tmp/andlogs/block direct access to those folders. - Apache virtual host: set
DocumentRoottoWeb/webroot, withmod_rewriteenabled andAllowOverride All. - nginx: route every request to
webroot/index.phpand never expose the parent folder.
Example Apache virtual host:
<VirtualHost *:443>
    ServerName your-domain.example
    DocumentRoot /var/www/academy/Web/webroot
    <Directory /var/www/academy/Web/webroot>
        AllowOverride All
        Require all granted
    </Directory>
</VirtualHost>
Example nginx server block:
server {
    listen 443 ssl;
    server_name your-domain.example;
    root /var/www/academy/Web/webroot;
    index index.php;
    location / { try_files $uri /index.php?$args; }
    location ~ \.php$ {
        include fastcgi_params;
        fastcgi_pass unix:/run/php/php8.4-fpm.sock;
        fastcgi_param SCRIPT_FILENAME $document_root$fastcgi_script_name;
    }
}
Make Web/tmp/, Web/logs/, Web/storage/, Web/config/ and Web/webroot/images/ writable by the web server user. config/ is written only during the installation; you may make it read-only again afterwards. webroot/images/ receives the copies of the logo, homepage slide and blog images you upload in Website & CMS, so it stays writable.
Subdomain folders inside
public_html: some panels create a subdomain’s folder inside the main domain’s web root (for examplepublic_html/academy/). After installation the application answers only on its own site address, but its static files stay reachable through the main domain. Where the panel allows it, place the subdomain folder outside the main domain’spublic_html.
Step 4: Select PHP and enable extensions #
- In the hosting panel, select PHP 8.3 or 8.4 for the site.
- Enable every required extension.
sodiumis often switched off by default (for example under PHP Configuration → PHP Extensions). - Recommended limits:
memory_limit256M or more. For the full 250 MB video upload range,upload_max_filesize250M andpost_max_size260M. Lower upload values only give a warning and limit the largest file staff can upload.
Step 5: Open the installer and enter the setup token #
- Visit
https://your-domain.example/install. Until the installation is complete, every other address of the site redirects here. - The first visit creates the file
Web/storage/install/setup-token.txton the server. - Open that file with your hosting file manager, SFTP or SSH, copy its exact content and paste it into the Welcome page.
The token proves that the person installing controls the server, not only the web address. Five wrong attempts from one address block that address for up to fifteen minutes. If you prefer your own token, delete the file and create it again with a value of your choice (16–256 printable characters on one line) before pasting the same value.
Step 6: Complete the seven installer steps #
1. Welcome #
Shows the product, version, package and documentation links, and asks for the setup token.
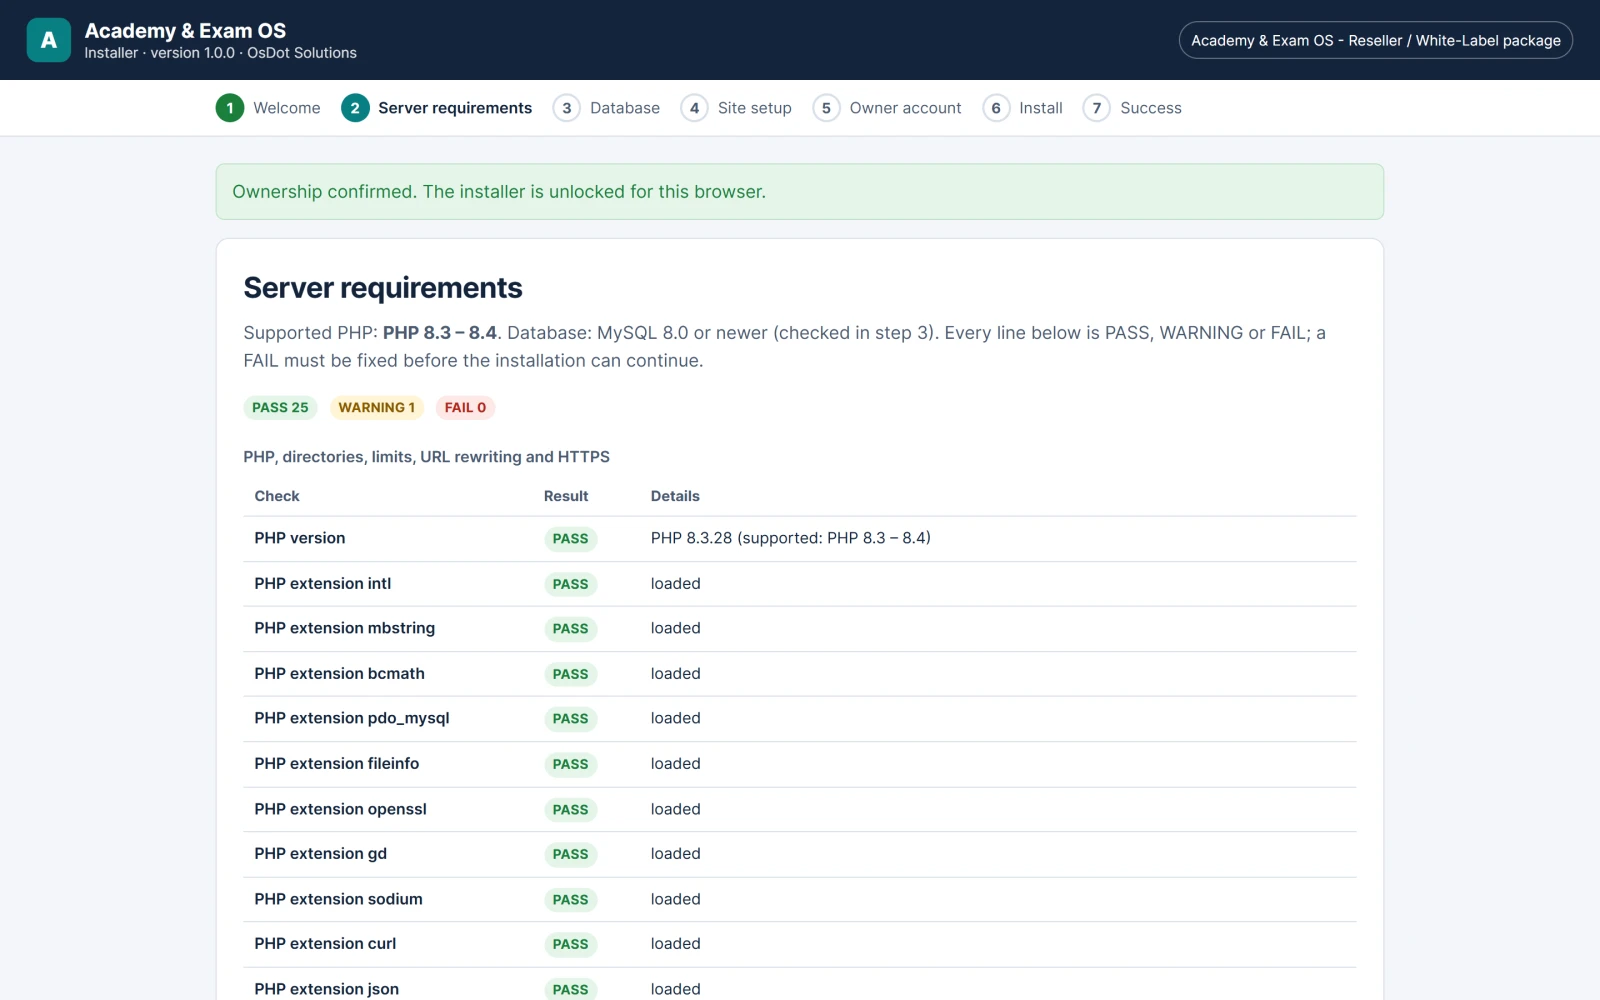
2. Server requirements #
A PASS / WARNING / FAIL table for the PHP version, extensions, writable folders, upload and memory limits, URL rewriting, HTTPS and outbound TLS. The installer never continues past a FAIL: fix the cause and reload the page.
3. Database #
Enter the host, port, database name, user and password, then click Test connection. The test names the database engine and version and checks the character set, sql_mode, the user’s privileges, binary logging and whether the database is empty. It only reads; nothing is written before the installation phases start. Only a successful test unlocks Continue.
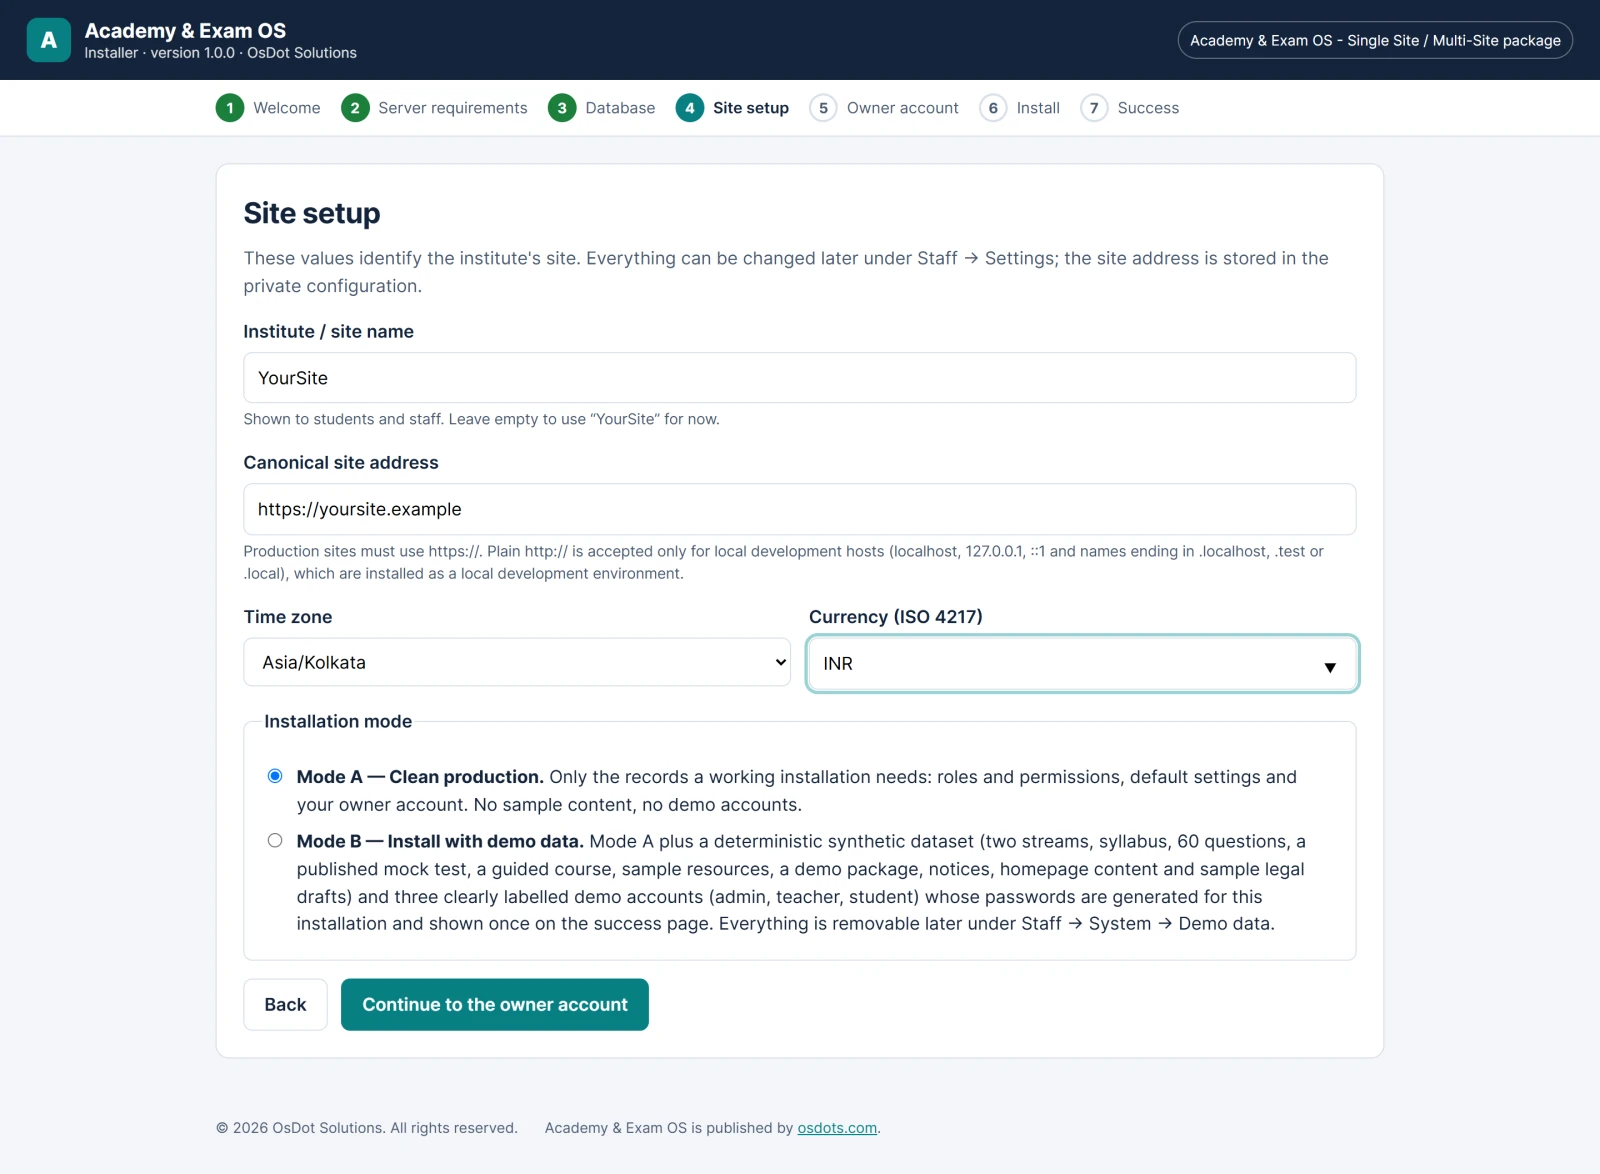
4. Site setup #
Enter the institute / site name (you can change it later), the canonical site address (the HTTPS address visitors will use), the time zone and the currency, then choose the installation mode:
- Mode A — Clean production: only the records a working installation needs. No sample content and no demo accounts. Choose this for a real site.
- Mode B — Install with demo data: Mode A plus a synthetic evaluation dataset and three demo accounts, all removable later. See Demo Data (Mode B).
5. Owner account #
Enter your name, e-mail address and a password of 12–128 characters. This becomes the institute owner account; the password is hashed the moment you submit the form.
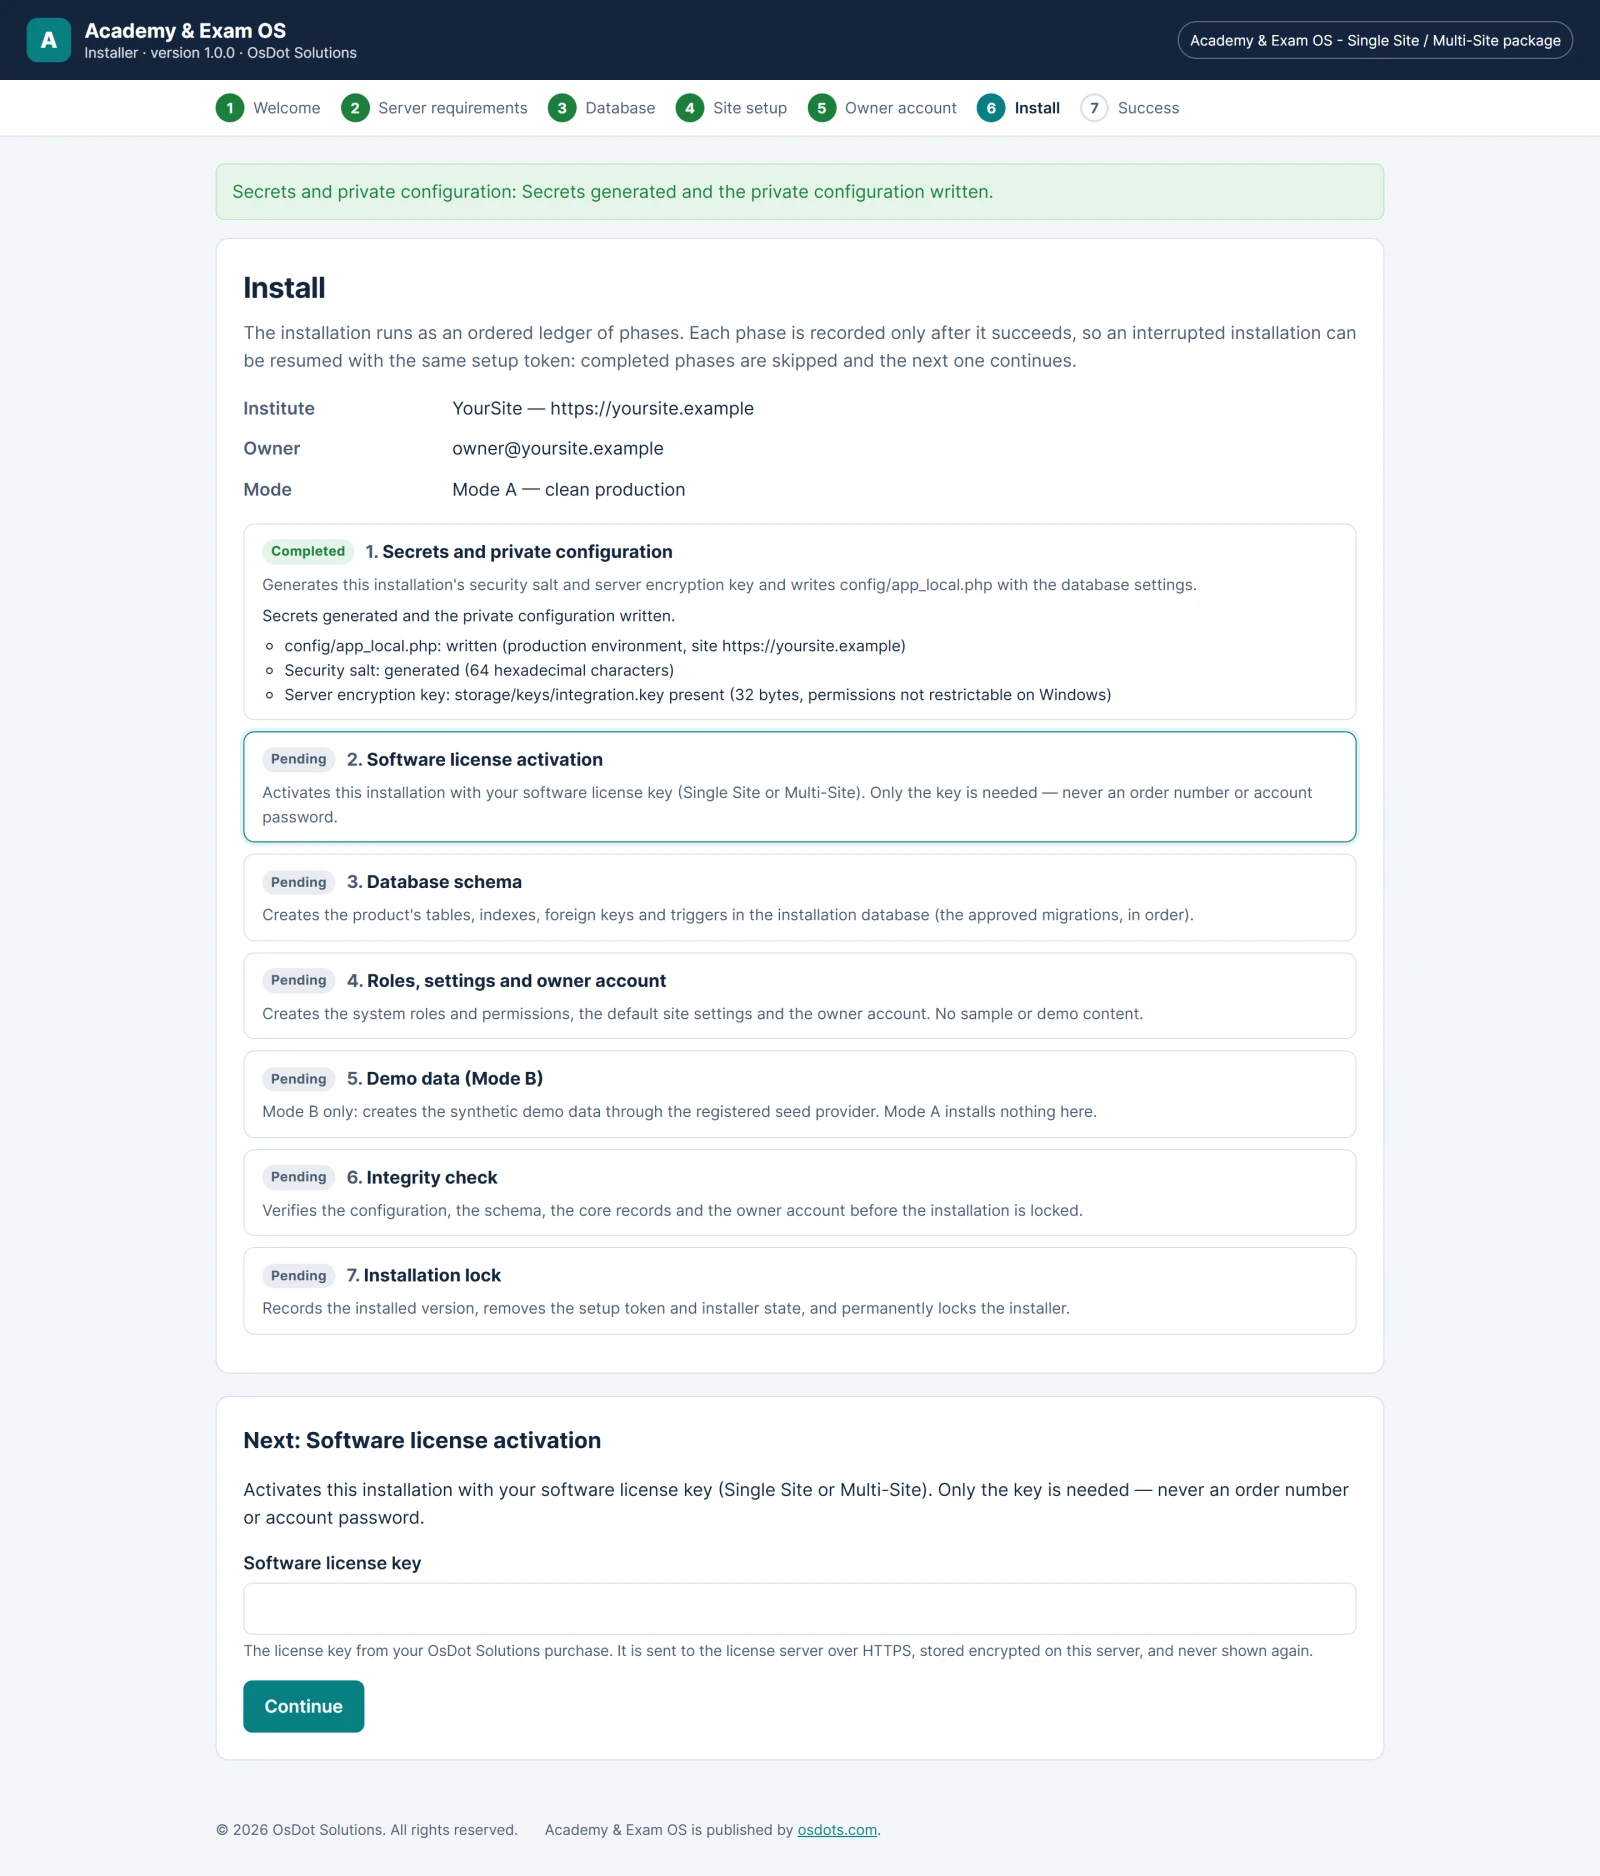
6. Install #
The installation runs as a list of phases, one at a time. A failed phase can be retried; completed phases are never repeated.
- Single Site and Multi Site: secrets and private configuration, Software license activation, database schema, roles, settings and owner account, demo data (Mode B only), integrity check and installation lock. When the licence phase is reached, enter your Software license key and click Continue. See Licence Activation & Deactivation.
- Reseller / White-Label: the same phases without the licence activation.
7. Success #
Shows the sign-in link, an installation summary and a go-live checklist. In Mode B, the three demo accounts and their generated passwords are shown only on this page, once. Store them safely or regenerate them later.
Expected result: after the final phase, /install and every /install/... address answer 404 and the site opens normally. There is no reinstall route.
If the installation is interrupted #
If the browser closes or the server times out during a phase, open /install again, paste the same token and continue. The installer resumes with the next phase and never repeats completed work.
What the installer writes #
| File | Content |
|---|---|
Web/config/app_local.php | This installation’s private configuration: security salt, database credentials and site address. Back it up. |
Web/config/installed.php | The installation marker: version, time, installation identifier and mode. Its presence locks /install. |
Web/storage/keys/integration.key | The installation’s own encryption key for stored credentials (SMTP, AI, Google, payments). |
Web/storage/install/install.log | The installation audit trail. It contains no secrets. |
After the installation #
- Sign in with the owner account at
/login. - Add the cron jobs: Cron Jobs & Background Worker.
- Configure e-mail and send a test message: E-mail & SMTP Settings.
- Complete the First-Time Setup: branding, contact details, legal pages and a first backup.
Security headers and CDNs: the application sends its own security headers, including a strict Content-Security-Policy. Some hosting CDNs or “force HTTPS” features replace that header with their own. Turn such replacement off where your panel allows it. See Security Checklist.
Related documents #
Watch the Video Tutorial #
Academy & Exam OS Video Tutorial 01: Installation & Hosting Setup shows this topic step by step (7:36).