
Creating & Managing Mock Tests
4 min read
A Mock Test is a timed (or untimed) exam built from approved questions in your question bank. You configure it as a draft edition and publish it when it is ready. Publishing freezes the questions and marks of that edition, so students who have started keep the paper they started with.
Who can do this: owners and administrators create, set up and publish Mock Tests. With the default permissions, teachers can create learning content but cannot publish tests.
Before you start #
- Approve the questions you want to use in the Question Bank. Only approved questions can be mapped to a test.
- Optional: set the institute’s default marking under Mock Tests → Mock Test Settings (see Marking defaults below).
Limits #
| Limit | Value |
|---|---|
| Questions per attempt | Up to 200 (all fixed questions plus every random section’s draw) |
| Question pool per section | Up to 500 approved questions |
| Sections per test | Up to 20 |
| Test duration | 1–1,440 minutes |
| Attempts per student | 1–100 |
For example, a random section can draw 100 questions from a pool of 500. Test setup shows the running total against the 200 maximum and refuses a change that would go above it.
Step 1: Create the Mock Test #
- Open Mock Tests → Mock Tests (
/staff/content?type=exam). - Click Create learning content and set Resource type to Mock Test.
- Fill in:
- Exam stream, Title and Public summary (required);
- URL slug (leave empty to use the title);
- Syllabus categories (required);
- Student access: Free to signed-in students or Premium — requires a matching package or grant;
- Audience: All eligible students or Selected batches only.
- Click Save learning content.
Expected result: the test is saved as a draft and, if you can publish tests, Test setup opens. You can also open it later from the Mock Tests list with Test setup.
Step 2: Edit the test settings #
In Test setup, click Edit test settings:
| Setting | Options |
|---|---|
| Timing | One overall timer, Separate timed sections in order, or Untimed practice |
| Overall duration | Minutes, for one overall timer (1–1,440) |
| Attempts per student | 1–100 |
| Release results | Immediately after complete marking, After the scheduled test closes, or When authorised staff release them |
| Available from / Closes at | Optional, in UTC. After the scheduled test closes requires a closing time. |
| Student instructions | Shown to students before they start |
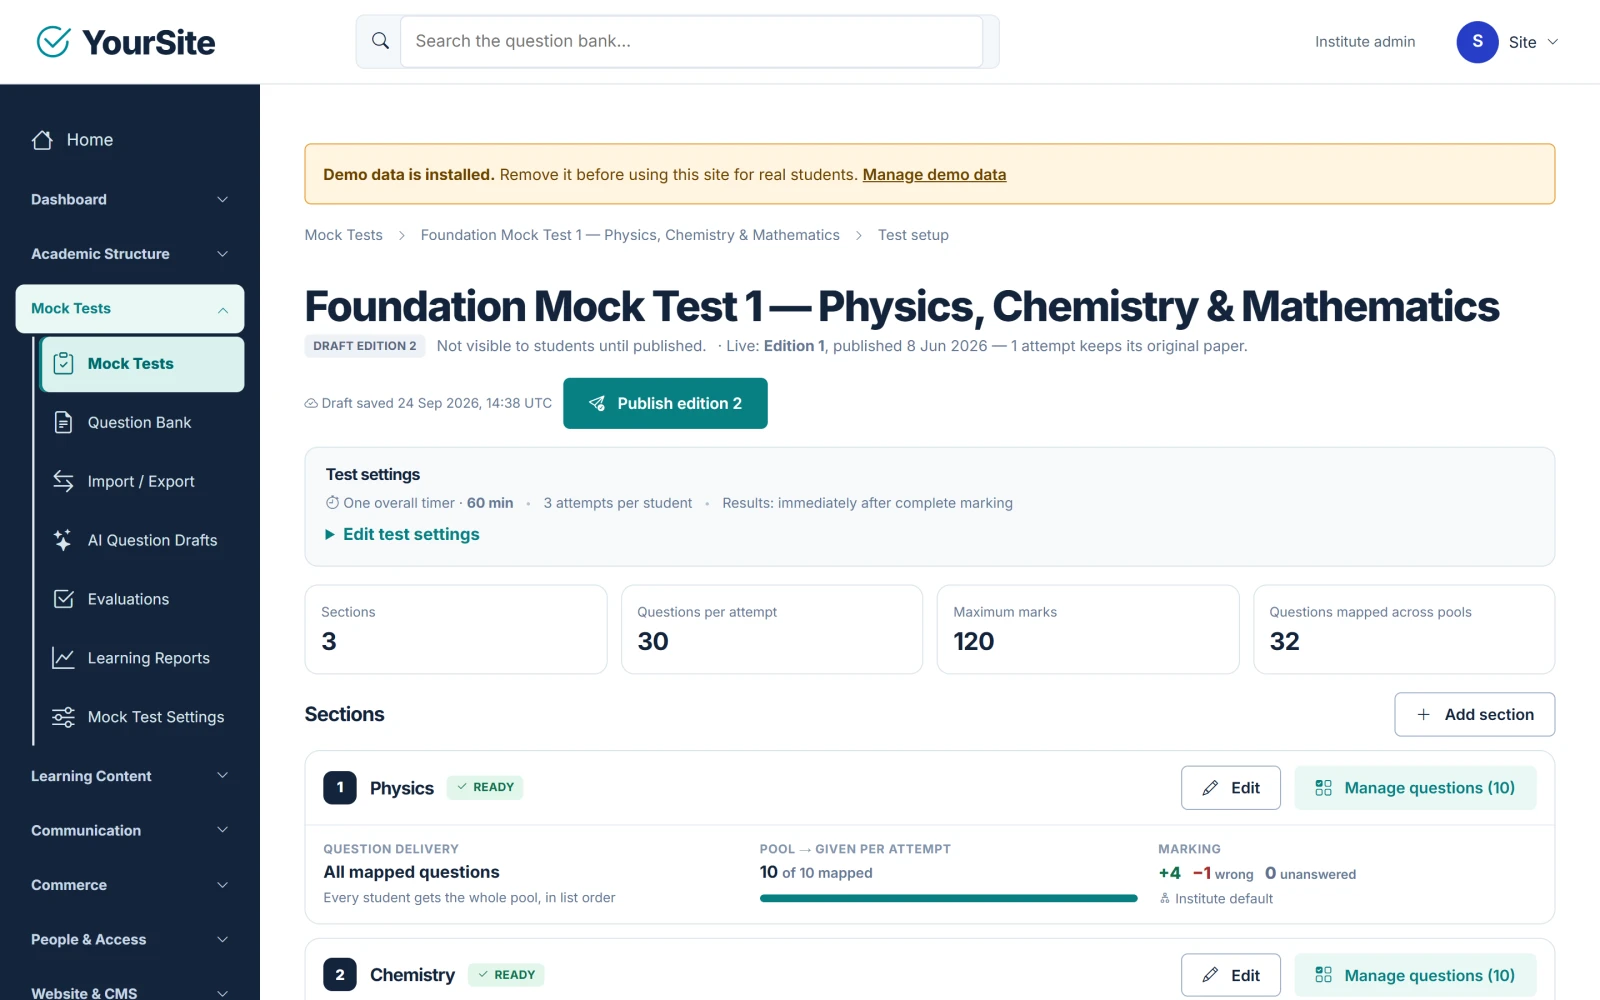
Click Save test settings. A new test starts with one overall timer of 30 minutes, one attempt, immediate result release and one section named “Section 1”.
Step 3: Build the sections #
The totals panel shows Sections, Questions per attempt (of 200 max), Maximum marks and Questions mapped across pools.
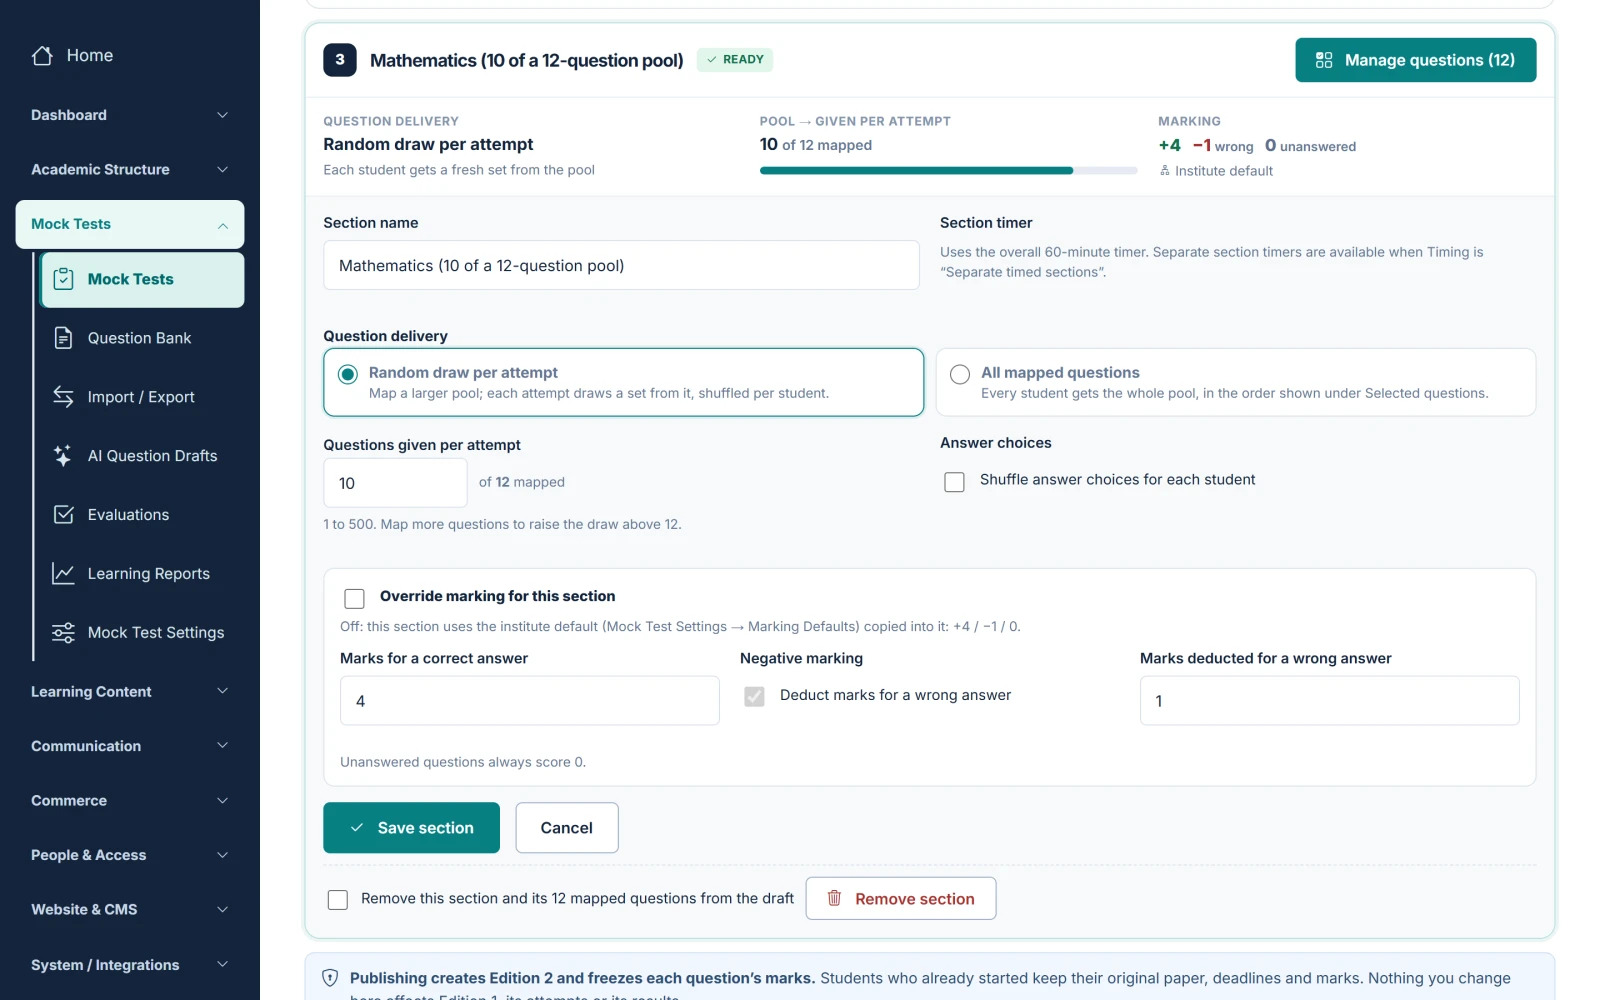
- Click Add section (up to 20), or Edit on an existing section.
- Enter the Section name. With Separate timed sections in order, also enter the Section duration (minutes).
- Choose the Question delivery:
- Random draw per attempt — each student gets a fresh set drawn from the section’s pool, in shuffled order;
- All mapped questions — every student gets the whole pool, in list order.
- Set Questions given per attempt.
- Optional: tick Shuffle answer choices for each student.
- Optional: tick Override marking for this section and set Marks for a correct answer and the wrong-answer deduction. Unanswered questions always score 0.
- Click Save section.
To delete a section, tick the confirmation and click Remove section. A test must keep at least one section.
Step 4: Map questions to each section #
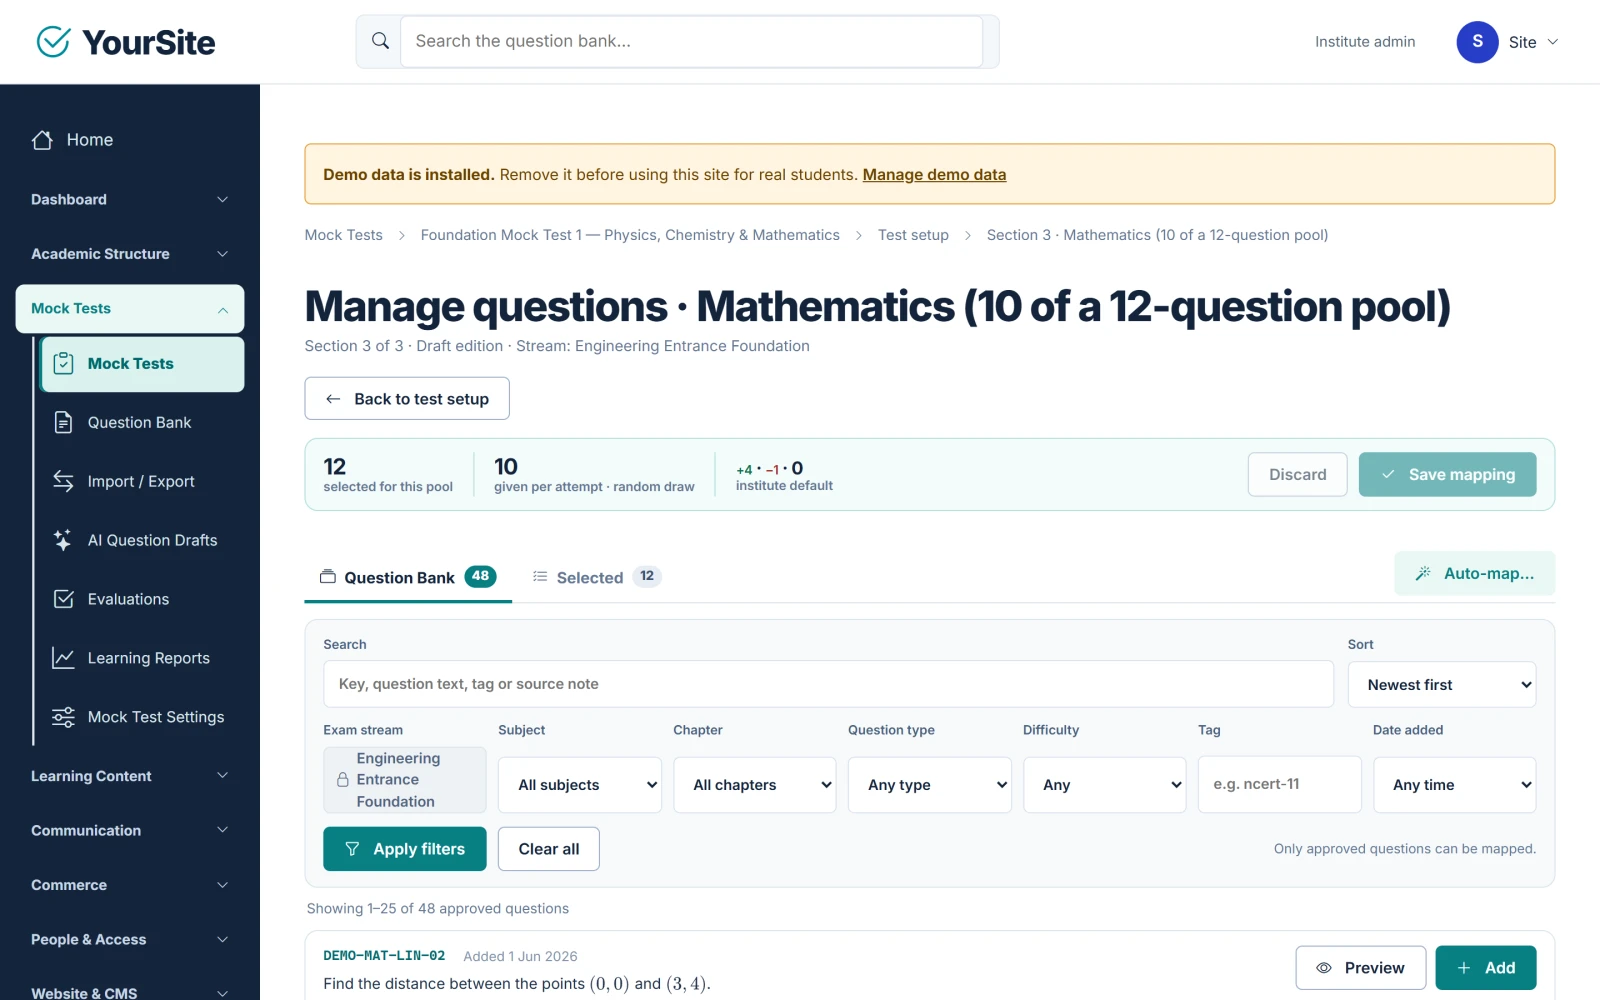
- On a section, click Manage questions.
- Filter the question bank (the test’s stream is fixed). Only approved questions are listed.
- Select questions in the Question Bank tab and check them in the Selected tab.
- Click Save mapping (or Discard to cancel your changes).
A question can belong to only one section of a test.
Auto-map #
Auto-map… is a rule-based helper, not AI. It uses your current filters and proposes approved questions that are not already in the test:
- Choose Random or Newest first and the Number of questions (1–500).
- Click Find questions.
- Click Draw again for a different proposal, or Add N to selection to accept it.
- Click Save mapping. Nothing is saved before this.
Step 5: Publish the edition #
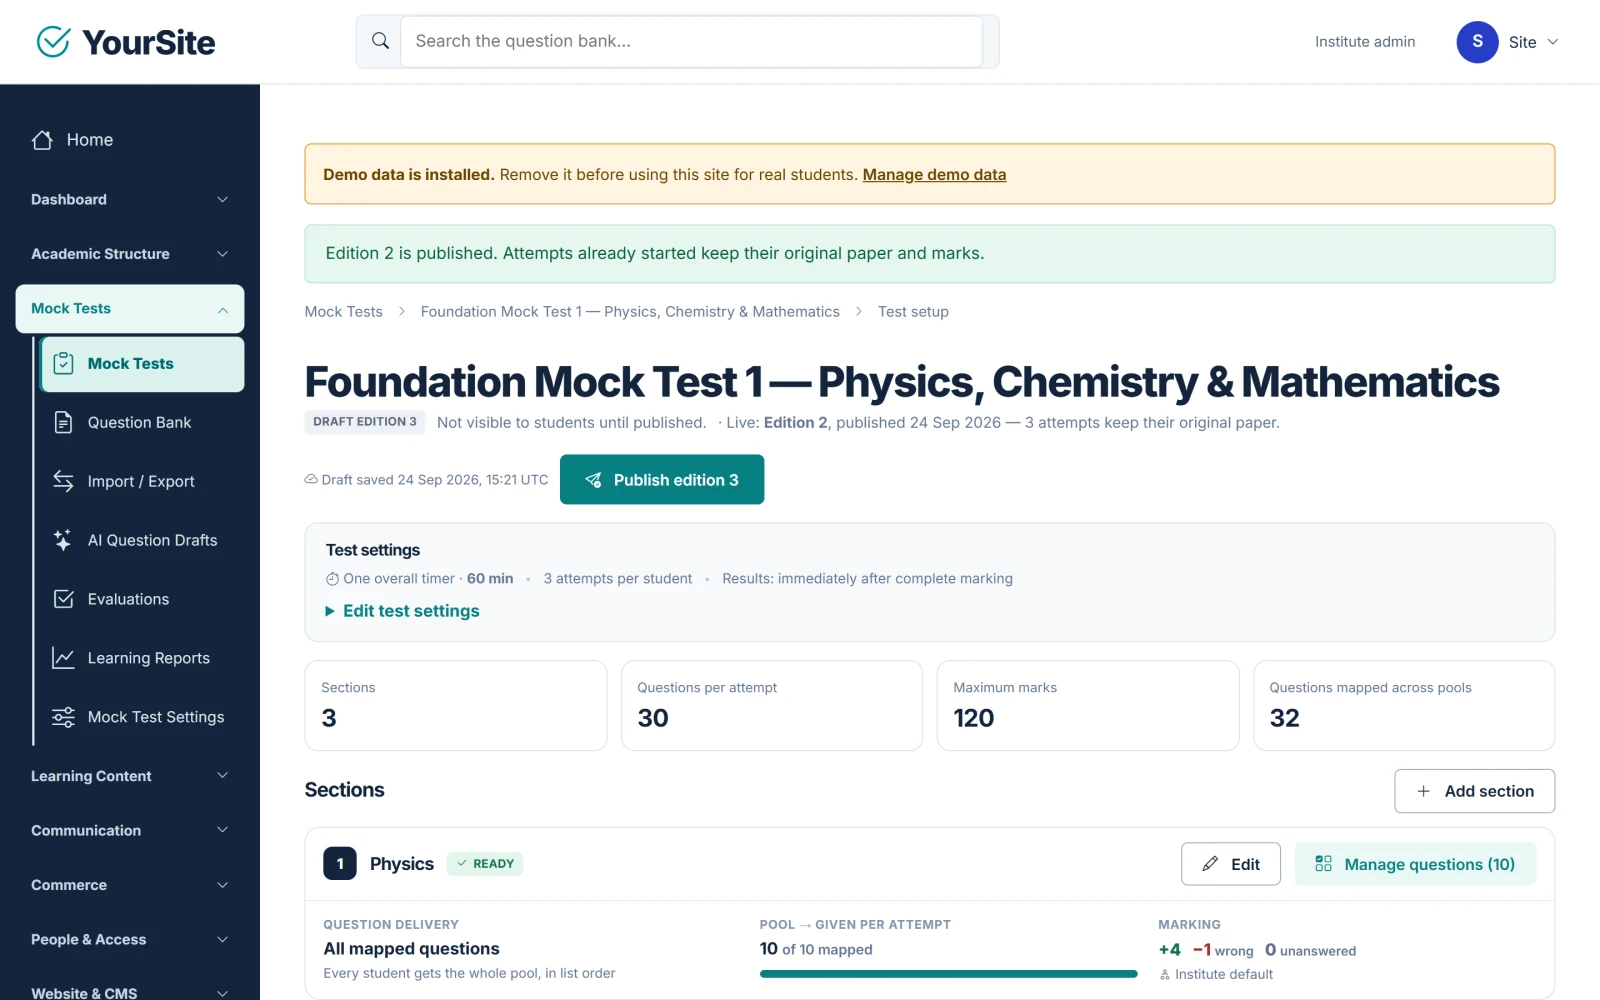
When the draft is complete, click Publish edition N in Test setup.
The button stays disabled while something blocks publication:
- a section’s pool is empty, or a section draws more questions than its pool holds;
- a mapped question is not approved, or was edited after approval;
- the test would give more than 200 questions per attempt.
Expected result: “Edition N is published. Attempts already started keep their original paper and marks.” Students who can access the test now see it under Mock Tests on your website and in the app.
Change a published test #
Test setup always works on the next draft edition; the live edition stays unchanged until you publish again. Make your changes to settings, sections or mapped questions, then click Publish edition N for the new edition. Attempts already started keep their original paper and marks.
Details and publication: Saving a published test’s details (title, summary, access or audience) with Edit and Save learning content keeps it published, so students can keep starting it. The details form never publishes a draft test: publication always goes through Test setup. To take a test out of publication, set Publication status to Draft and save.
Marking defaults #
Owners and administrators open Mock Tests → Mock Test Settings (page title Marking Defaults) to set:
- Correct answer — marks awarded (greater than 0);
- Negative marking and the Wrong-answer penalty;
- Unanswered — always 0.
Click Save defaults. The built-in default is +4 / −1 / 0. The defaults apply to new sections; existing sections keep their marking, and each section can override it.
How answers are scored #
- Single Choice MCQ: the correct choice earns the section’s marks; a wrong choice loses the section’s wrong-answer penalty when negative marking is on.
- Multiple Correct MCQ: marks only for exactly the correct set of choices; there is no partial credit.
- Numerical: correct when the answer is within the question’s tolerance.
- Written: marked by staff under Evaluations. See Student Test Experience, Attempts & Results.
Related documents #
- Question Bank
- Student Test Experience, Attempts & Results
- Payments & Orders — selling access to premium tests
- Cron Jobs & Background Worker — required for sealing and grading timed attempts
Watch the Video Tutorial #
Academy & Exam OS Video Tutorial 05: Creating & Publishing Mock Tests shows this topic step by step (5:07).