
Payments & Orders
8 min read
Academy & Exam OS sells packages — bundles of tests, materials, videos and courses with a fixed access period — to your students. Students can pay online through Stripe, Razorpay or PayPal, offline (for example bank transfer, mobile or wallet payment, or cash, verified by staff), or both.
Online payments are your institute’s own transactions, processed in your own Stripe, Razorpay or PayPal account. Academy & Exam OS never touches the money and never sees card numbers: students pay on the provider’s page or in the provider’s payment window. Tax rules and in-app purchases are not part of this release.
Who can do this: owners and administrators.
Step 1: Create a package #
Commerce → Sales Packages holds the packages students can buy.
| Field | Meaning |
|---|---|
| Name, slug, summary | What students see |
| Currency | The package’s currency |
| Price in minor units | The price in the smallest currency unit (cents, pence, paise …); for a currency without minor units, such as JPY, the whole amount |
| Access period in days | 1–3,650 days from purchase |
| Included learning resources | Published premium tests, materials, videos and courses |
| Status | Whether the package is offered |
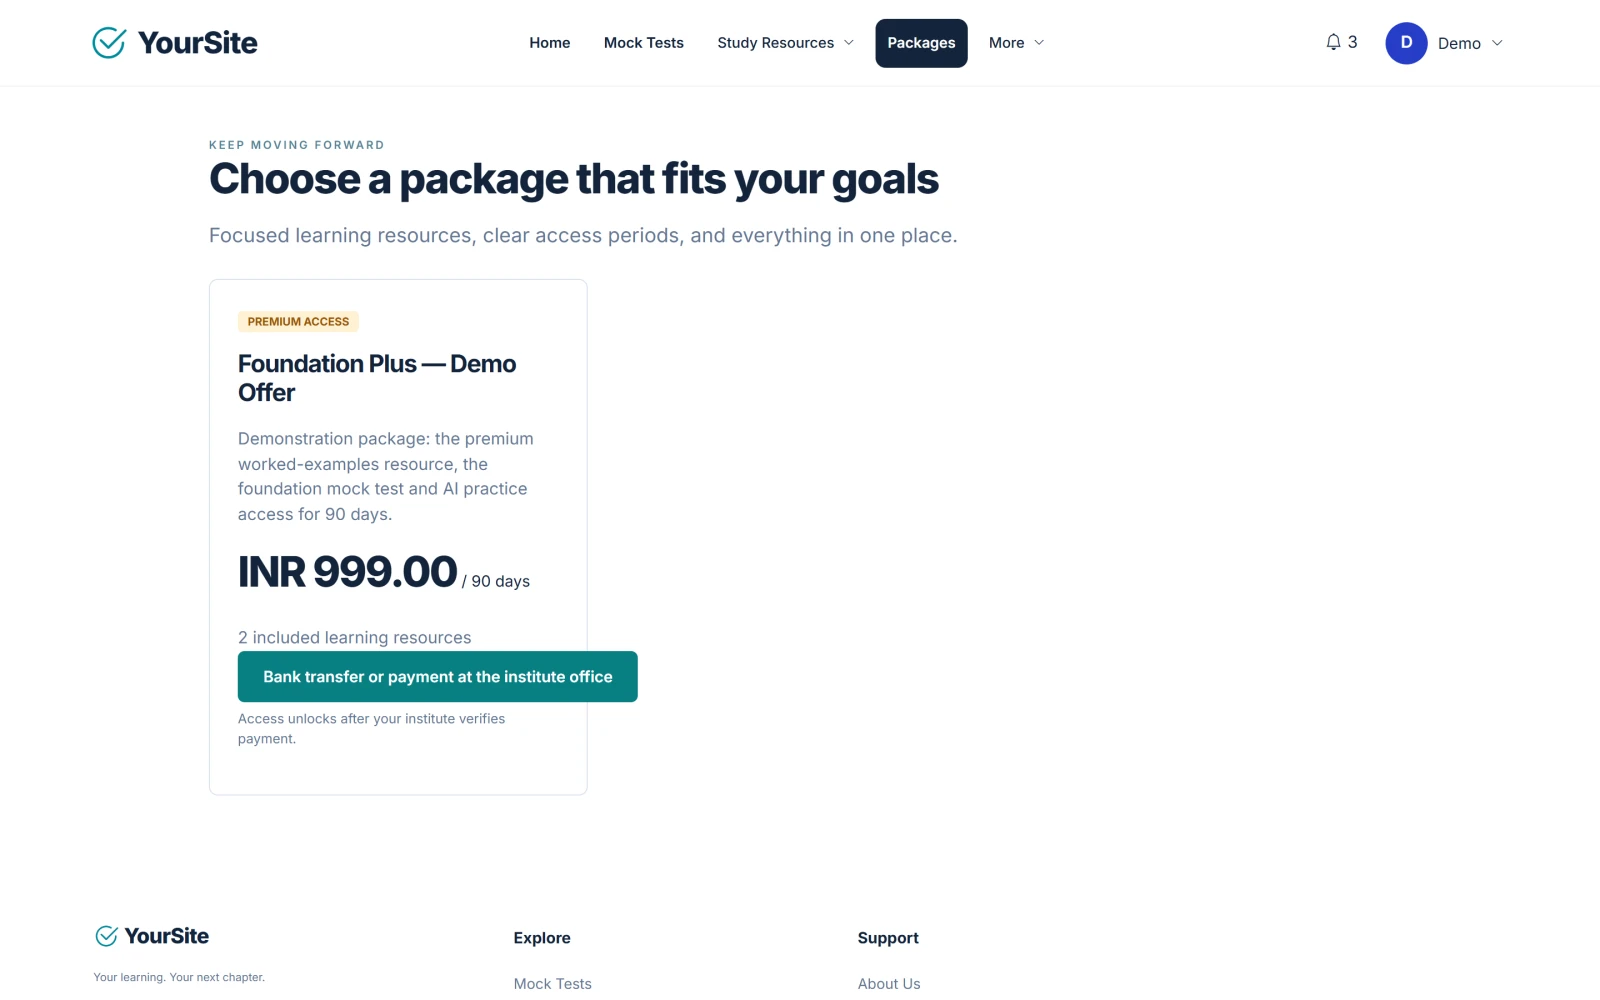
Every save creates a new package edition. A course included in a package gives access to its current lessons. Students see the package with its price, access period and number of included resources at /packages.
Which gateway for your country? #
Choose a provider that can open an account for your institute and accept the currency of your packages. Checkout offers each student only the methods that accept the package’s currency, and the settings page warns when an enabled provider cannot take a currency you use.
| Provider | Accounts | Currencies |
|---|---|---|
| Stripe | Businesses in the countries Stripe supports | More than 135; the country of your Stripe account decides which |
| PayPal | Businesses in most countries | 25: AUD, BRL, CAD, CHF, CNY, CZK, DKK, EUR, GBP, HKD, HUF, ILS, JPY, MXN, MYR, NOK, NZD, PHP, PLN, RUB, SEK, SGD, THB, TWD and USD. HUF, JPY and TWD only in whole units; BRL, CNY and MYR only for PayPal accounts registered in that country. |
| Razorpay | Businesses registered in India | INR; other currencies once international payments are enabled on the account |
Each provider’s countries, currencies and fees change over time: check its current terms before you go live. When no online provider fits a currency, students can still pay offline.
Step 2: Configure online payments (optional) #
Prerequisites: a Stripe, Razorpay or PayPal account, HTTPS on your site, and the scheduled background worker.
Open System / Integrations → Payment Configuration (/staff/settings/payments). Each provider has its own panel with a Test / Live mode switch (PayPal calls test mode Sandbox); credentials of one mode never work in the other: the page refuses mismatched Stripe and Razorpay keys, and Test connection reveals mismatched PayPal credentials.
| Provider | Fields | Where to find them |
|---|---|---|
| Stripe | Publishable key, Secret key, Webhook signing secret | Stripe Dashboard → Developers → API keys; the signing secret appears when you create the webhook endpoint |
| Razorpay | Key ID, Key secret, Webhook secret | Razorpay Dashboard → Account & Settings → API keys; the webhook secret is the one you choose when adding the webhook |
| PayPal | Client ID, Client secret, Webhook ID | PayPal Developer Dashboard → Apps & Credentials (choose Sandbox or Live) → your app; the Webhook ID appears after you add the webhook to that same app |
- Choose Test mode first and enter the provider’s test keys.
- Save, then click Test connection. It makes a read-only call and never creates a charge. For PayPal it also confirms that the Webhook ID belongs to your credentials; for Stripe it warns about any currency you use that your Stripe account does not list.
- Register the webhook at the provider (Step 3).
- Make a test purchase as a student, then switch to Live with your live keys.
Secrets are stored encrypted and never shown again. The Gateway order decides which provider is offered first; Default currency is informational, because each package carries its own currency.
Step 3: Register the webhook #
Webhooks are required. They tell your site about a payment when the student closes the browser, when a bank payment is confirmed later and when a refund settles. The endpoint addresses are shown on the settings page:
- Stripe:
https://your-domain/payments/webhooks/stripe— subscribe tocheckout.session.completed,checkout.session.async_payment_succeeded,checkout.session.async_payment_failed,checkout.session.expired,payment_intent.payment_failed,refund.updated,refund.failed,charge.refundedandcharge.dispute.created. - Razorpay:
https://your-domain/payments/webhooks/razorpay— subscribe topayment.captured,payment.authorized,payment.failed,order.paid,refund.processed,refund.failedandrefund.created. - PayPal:
https://your-domain/payments/webhooks/paypal— subscribe toCHECKOUT.ORDER.APPROVED,CHECKOUT.ORDER.COMPLETED,CHECKOUT.PAYMENT-APPROVAL.REVERSED,PAYMENT.CAPTURE.COMPLETED,PAYMENT.CAPTURE.PENDING,PAYMENT.CAPTURE.DECLINED,PAYMENT.CAPTURE.REFUNDED,PAYMENT.CAPTURE.REVERSED,PAYMENT.REFUND.PENDING,PAYMENT.REFUND.FAILED,CUSTOMER.DISPUTE.CREATED,CUSTOMER.DISPUTE.UPDATEDandCUSTOMER.DISPUTE.RESOLVED, then copy the webhook’s ID into the Webhook ID field.
Every webhook delivery is verified before anything happens: Stripe and Razorpay deliveries with the webhook secret, PayPal deliveries by PayPal’s own verification service with your Webhook ID (your server needs outbound HTTPS access to PayPal). Unverified requests are refused, and repeated deliveries of the same event are harmless. All three providers deliver only to HTTPS addresses in live mode.
How an online purchase works #
- A signed-in, verified student opens a package and optionally enters a Coupon code and clicks Apply coupon. The server calculates the exact amount.
- The student chooses one of the online methods offered for the package’s currency (Stripe, Razorpay or PayPal) and pays at the provider. With PayPal, the student approves the payment and your server then captures it.
- The provider confirms the payment by webhook and, when the browser returns, the server checks with the provider. The browser’s return alone never marks an order paid.
- The verified payment is fulfilled exactly once: the order becomes Paid and the student’s access starts. A confirmation e-mail is sent when e-mail is configured.
Students see their orders under My Purchases. An unpaid order can be continued until it expires (45 minutes after creation) or cancelled; nothing is charged for a cancelled or expired order.
Offline payments #
- In Payment Configuration, fill in the Offline / Manual Payment panel with a title and instructions (for example your bank details or office cash hours).
- Students choose the offline option on a package, pay as instructed, enter a Transaction ID / reference number or a Payment note / message, optionally attach a Payment proof image, and click Submit for verification.
- Staff open Commerce → Offline Payments and click Review payment.
- Enter a Review note (at least 5 characters) and click Approve verified payment or Reject payment.
Expected result: approving grants the package’s content for its access period. The same reference cannot be submitted twice, and nobody can review their own payment.
Coupons #
Commerce → Coupons (page title Discounts & Coupons) creates discount codes: a fixed or percentage discount, a minimum order, all or selected packages, a validity window, a total usage limit and uses per student. Coupons apply to online checkout.
Manual access grants #
Commerce → Access Grants (page title Student Access Grants) gives a student access to a specific learning resource without a payment — for example a scholarship. Choose the student and resource, the start and expiry times (UTC), an optional revoke time, and a reason of at least 10 characters. Manual grants change the student’s access immediately.
Orders and refunds #
Commerce → Orders & Payments (/staff/orders) lists online orders with their state, provider, buyer and amount. The order page shows the payment history, the provider events received, the access granted and the audit trail.
Order states: Awaiting payment → Paid (or Payment failed / Cancelled) → Partially refunded / Refunded. A payment with a different amount or currency than the order is recorded but not fulfilled, and appears for review.
To refund, open the order and request a refund. It is executed at the provider:
- the amount can be any part of the remaining captured amount; leave it empty for a full refund;
- access can be ended only when the full remaining amount is refunded; a partial refund keeps access;
- ending access affects only the access created by that order — manual grants, offline payments and other orders are untouched;
- a refund made directly in the provider’s dashboard is recorded from the provider’s event with access kept, so that an administrator can decide.
Check with provider now on an order page reads the provider’s current state on demand, for example after a missed webhook. The background worker does the same automatically for open payments and pending refunds.
The mobile app never sells #
The app shows students their access and purchase history as read-only information, but has no checkout. Students buy on your website.
Related documents #
Watch the Video Tutorial #
This topic is also covered in Academy & Exam OS Video Tutorial 10: Website, CMS, Payments & Orders (watch on YouTube). All Academy & Exam OS video tutorials.